Homemade Peanut Butter Cookie Larabars: Better Than The Original
In a world bustling with convenient, pre-packaged snacks, Larabars have carved a niche for themselves with their minimalist ingredient lists and wholesome appeal. Among their beloved flavors, the Peanut Butter Cookie stands out as a fan favorite, evoking the comforting taste of a freshly baked treat without the oven or the guilt. But what if we told you that you could not only replicate this popular snack in your own kitchen but also elevate it to an even more delicious and healthier standard? Welcome to the wonderful world of homemade peanut butter cookie Larabars, where simplicity meets unparalleled flavor, and "better than the original" isn't just a claim—it's a delicious reality.
For years, snack enthusiasts have sought to crack the code of these fruit-and-nut bars, and the demand for a copycat peanut butter cookie Larabar recipe has been overwhelming. The good news? The recipe is incredibly simple, requiring just a handful of all-natural ingredients you likely already have on hand. Beyond the ease, making them yourself gives you complete control over the quality of each component, transforming a good snack into an extraordinary one. Prepare to discover a chewy, sweet, and perfectly salty delight that tastes just like a peanut butter cookie, only richer, fresher, and undeniably superior.
The Allure of Homemade: Why Your Kitchen Outshines the Store
While store-bought Larabars offer a fantastic option for on-the-go snacking, there's an inherent magic in creating your own. The satisfaction of knowing exactly what goes into your food, coupled with the ability to customize to your heart's content, makes homemade versions truly special. When it comes to peanut butter cookie Larabars, the homemade advantage is particularly pronounced. Imagine a snack bar with an even deeper, more authentic peanut butter flavor, balanced perfectly with natural sweetness and a hint of salt that dances on your palate. That's the promise of your kitchen.
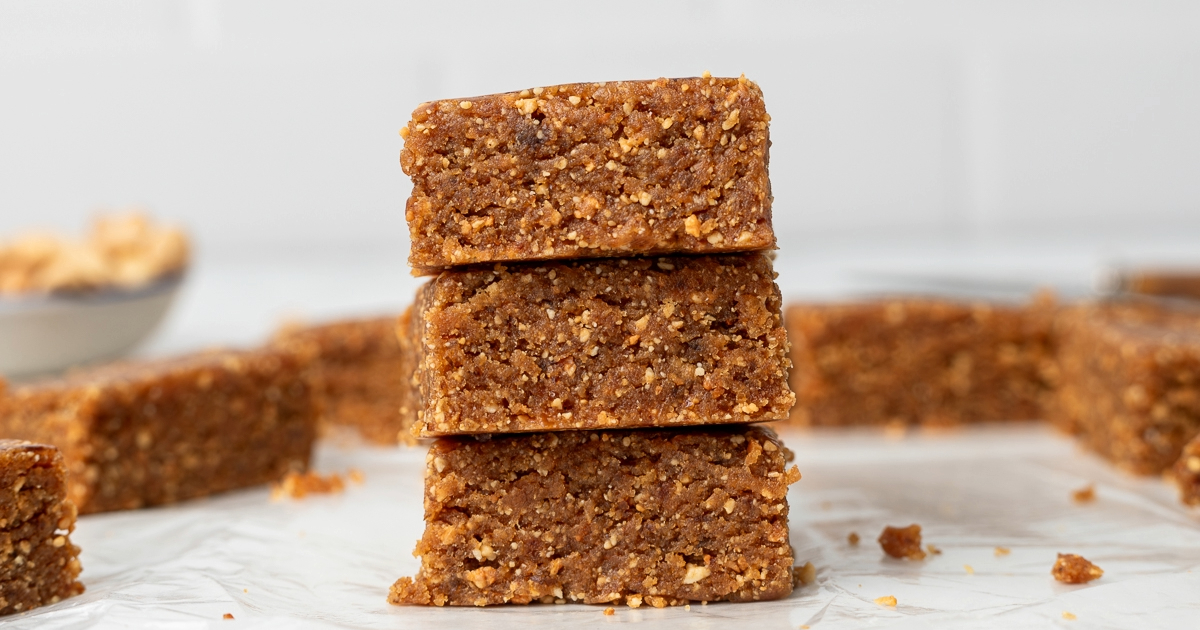
The original Larabar Peanut Butter Cookie flavor is celebrated for its simple three-ingredient foundation: peanuts, dates, and sea salt. It's a testament to how powerful natural ingredients can be when combined thoughtfully. However, by crafting these bars at home, you unlock an enhanced sensory experience. The dates are softer, the peanuts fresher, and the overall blend achieves a moist, chewy texture that often surpasses its store-bought counterpart. It’s like enjoying a peanut butter cookie straight from the oven, except it's raw, naturally sweetened, and packed with wholesome goodness. This allows you to truly appreciate the pure, unadulterated taste of each ingredient, creating a snack that not only satisfies your cravings but also nourishes your body.
Unveiling the Simplicity: Just 3-4 Wholesome Ingredients
The beauty of homemade peanut butter cookie Larabars lies in their elegant simplicity. You don't need a pantry full of obscure ingredients or a culinary degree. In fact, the core recipe calls for just three components, with an optional fourth that elevates the "cookie" factor. This minimal approach not only makes the recipe accessible but also highlights the quality of each ingredient.
Dates: Nature's Sweetener and Binder
Dates are the unsung heroes of these bars, serving a dual purpose as both the natural sweetener and the sticky binder that holds everything together. Their rich, caramel-like flavor perfectly complements the peanuts, while their natural sugars provide sustained energy. For the best results, opt for soft, pitted Medjool dates, which are incredibly moist and blend easily into a smooth paste. If your dates seem a bit dry, a quick soak in warm water for 10-15 minutes can soften them up, just be sure to drain them thoroughly before use. This ensures your peanut butter cookie Larabars achieve that perfect chewy consistency.
Peanuts: The Heart of the Flavor (Organic is Key!)
It goes without saying that peanuts are central to our peanut butter cookie Larabars. They provide the iconic flavor, a good source of protein, and healthy fats. However, it's crucial to pay attention to the type of peanuts you choose. Conventionally grown peanuts are notoriously exposed to a high volume of pesticides. To avoid these unwanted chemicals and ensure the purest flavor, always opt for organic dry roasted peanuts with no added salt for this recipe. This small but significant choice makes a big difference in the overall health profile and taste of your homemade bars. If you have a peanut allergy or simply prefer a different nut, feel free to experiment! Almonds, cashews, or even sunflower seeds can work wonderfully, offering a unique twist on the classic flavor profile.
Salt: The Flavor Enhancer
A touch of salt is essential for balancing the sweetness of the dates and enhancing the robust flavor of the peanuts. It prevents the bars from being overly sweet and truly brings out the rich, nutty notes. High-quality salts like Redmond's Real Salt or Celtic Sea Salt are excellent choices, offering a broader mineral profile and a clean, nuanced flavor. Start with a quarter teaspoon and adjust to your preference, aiming for that perfect sweet-and-salty equilibrium that makes these bars so addictive.
Optional Vanilla Extract: Elevating the Cookie Vibe
While technically optional, a half-teaspoon of organic vanilla extract can truly transform your peanut butter cookie Larabars from a delicious snack into an authentic cookie experience. Vanilla extract adds a depth of flavor that mimics the warmth and complexity of baked goods, making your no-bake bars taste even more like they came straight from a cookie sheet.
Crafting Your Homemade Peanut Butter Cookie Larabars: A Step-by-Step Guide
The process of making these delicious bars is incredibly straightforward, primarily relying on the power of your food processor. Get ready to create a batch of wholesome snacks that will be gone before you know it!
Essential Tools: The Mighty Food Processor
A good quality food processor is your best friend for this recipe. It efficiently breaks down the nuts and dates, transforming them into a cohesive, dough-like mixture. A high-powered blender might also work, but a food processor typically handles the stickiness and density of the ingredients more effectively without overheating.
Preparation and Blending
- Process Peanuts and Salt: Begin by adding your organic dry roasted peanuts and sea salt (and optional vanilla extract) to the food processor. Pulse and then process on high until the peanuts are finely broken down, almost resembling coarse flour. This step ensures an even texture and prevents large chunks of nuts in your final bar.
- Gradually Add Dates: With the food processor running, start adding the pitted dates, one or two at a time. This gradual addition allows the dates to incorporate evenly with the peanut mixture. Continue processing until the mixture starts to clump together and form a sticky dough. This usually takes 3-5 minutes, depending on the power of your processor and the moisture content of your dates. You'll know it's ready when the mixture pulls away from the sides of the bowl and forms a ball or a large cohesive mass.
Shaping and Chilling for Perfection
Once your dough is formed, it's time to shape your bars and let them firm up.
- Press into a Pan: Line a bread loaf pan (for thicker bars) or a 9x13 inch pan (for a larger batch of thinner bars) with parchment paper. Transfer the dough to the prepared pan and press it down firmly and evenly. You can use your hands, a spatula, or even the bottom of a glass to achieve a smooth, compact surface.
- Chill to Set: Cover the pan with a lid or another piece of parchment paper. Place it in the fridge for at least 2 hours, or in the freezer for about 30-60 minutes, until the dough is firm. This chilling process is crucial for making the bars easy to cut and ensuring they hold their shape.
- Cut and Enjoy: Once chilled, lift the block of dough out of the pan using the parchment paper. Cut it into your desired bar size. Slice them into traditional bar shapes, or even small squares for bite-sized treats.
For more detailed step-by-step instructions and practical tips, consider checking out our related articles: Craft Your Own 3-Ingredient PB Cookie Larabars: Simple & Healthy and Easy Peanut Butter Cookie Larabars: No Bake, Organic & Delicious.
Beyond the Basics: Customization and Storage Tips
One of the greatest joys of making your own peanut butter cookie Larabars is the freedom to customize them to your liking. While the core recipe is a winner, a few tweaks can make them truly yours.
Personalizing Your Peanut Butter Cookie Larabars
- Chocolate Chip Delight: For an extra layer of decadence, fold in a handful of mini organic chocolate chips after the dough has formed in the food processor.
- Nutty Variations: As mentioned, don't hesitate to swap out peanuts for other nuts like almonds, cashews, or even a mix of seeds for a different flavor profile and nutritional boost.
- Spice It Up: A pinch of cinnamon or nutmeg can add a cozy warmth, enhancing the "cookie" experience even further.
- Boost the Protein: If you're looking for a post-workout snack, you could experiment with adding a scoop of unflavored or vanilla protein powder, though this might alter the texture slightly and require a bit more date or liquid to achieve the desired consistency.
Optimal Storage for Lasting Freshness
These homemade peanut butter cookie Larabars are so delicious, they might not last long! However, proper storage ensures they stay fresh and enjoyable for longer.
- Refrigeration is Key: Store your bars in an airtight container in the refrigerator. This keeps them firm and extends their shelf life to about 1-2 weeks.
- Freezer-Friendly: For longer storage, individually wrap the bars in parchment paper or plastic wrap and store them in an airtight container in the freezer. They'll keep well for up to 2-3 months. Simply pull one out and let it thaw for a few minutes at room temperature before enjoying.
- Batch Cooking: This recipe is perfect for doubling or tripling! Make a large batch in a 9x13 inch pan and freeze them. You'll have a ready supply of healthy, homemade snacks for weeks to come, perfect for meal prep or busy schedules.
Embrace the joy of creating these delicious and wholesome snacks. Not only will you save money, but you'll also savor a superior taste and the peace of mind that comes from knowing every ingredient is of the highest quality.
